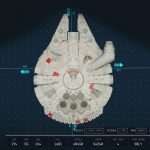
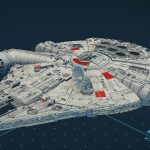

Star Wars YT-1300 Millennium Falcon 1977
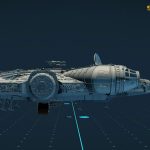
This mod adds Han Solo’s Millennium Falcon from Star Wars original trilogy to Starfield. All modular, custom-made, and colorable. No mods necessary.
The Millennium Falcon is a heavily modified YT-1300 Corellian light freighter previously owned by numerous individuals including Lando Calrissian and Han Solo and she is a smuggler’s ship which boasts herself to be the fastest ship in the galaxy. Now she belongs to you! Enjoy sailing her to the every corner of Starfield galaxy!
This ship utilizes vanilla meshes:
1. Habs (Hab)
2. 2 Horizon weapon mounts and 3 equipment plates (Structural)
3. 1 Particle weapon (secondary) and 1 Missile (tertiary)
This ship has custom-designed ship parts:
4. 1 YT-1300 Bay (Bay)
5. 5 YT-1300 Landers (Gears) – 3 single and 2 dual
6. 1 YT-1300 Fuselage (for encapsulation) (Structural)
7. 1 YT 1300 Cockpit (Cockpit)
8. 1 Quadex power core (Reactor)
9. 1 Isu-Sim SSP05 hyperdrive (Grav)
10. 1 YT-1300 shielded Cargo (Cargo)
11. 1 YT-1300 fuel tank (Fuel)
12. 1 Torplex Deflector with Nordoxicon Anti-concussion, Novaldex stasis-type (Shield)
13. 1 Carbanti 29L Scan Jammer (Equipment)
14. 1 YT-1300 Docker (Docker)
15. 2 Lasers (primary) – CEC AG-2G Quad lasercannons – top and btm
16. 1 Girodyne SRB42 sublight engine (Engine)
Installation
Install with ModOrganizer 2 or Install with Plugin.txt mod
While in game
Visit any shipyard or use your own shipyard to bring up the parts. (Taiyo sells equipment plates)
Before you build
Due to the nature of ship building in this manner and lack of tools for making precise collision meshes, it is mandatory for you to put this line in your Starfieldcustom.ini
[Spaceship]
fShipBuilderModuleOverlapTolerance=-4
Build Manual
Building time: average 30 min (If you are really fast, you can do it in 10 min) Follow simple 16 steps.
1. Habs
Create a 3×3 hab using any combinations.
For example:
Place a 2×2 hab (I recommend Nova 2×2 AIO hab)
Place a 3×1 hab on the port side. (I recommend Nova 3×1 Engineering hab)
Place two 1×1 habs (I recommend Nova 1×1 storage hab) on the aft side of 2×2 hab.
Place a 1x1hab on the middle fore point of the main 3×3 hab.
Now here comes the tricky part:
Place a 3×1 Invisible “front” hab on the fore side of the frontal 1×1 hab.
Place a 1×1 invisible “side” hab on the port aft side of the 3×3 hab.
Duplicate it and place another 1×1 “invisible –side” hab next to it.
Refer to media section of this mod for pictures and a video.
2. Weapon and equipment mounts (Structural)
Place 2 weapon mounts on each side and 3 equipment plates on top.
3. Weapons (Particleand missile)
Mount weapons of your choice on each side (i.e. Particle on port, Missile on Stbd)
Lower the level by pressing F a few times so that weapons get mounted on the lower side of weapon mounts.
4. Bay
Place YT-1300 bay under the middle, stbd, btm side of the 3×3 hab.
5. Gear
Place 5 YT-1300 landing gears on the bottom of habs
1) 1 single gear under btm of 1×1 hab
2) 2 single gears under the fore btm 3×3 hab
3) 2 dual gears of 3×3 hab. Under aft btm
6. Fuselage(Structural)
Place the YT-1300 fuselage on the very center of 3×3 hab. She is 34.75m long, from stem to stern. From now, it is so easy. Just feel the force.
7. Cockpit
Place the YT-1300 cockpit on the top right corner of fuselage.
8. Reactor
Place the YT-1300 reactor (C class) on the btm left side.
9. Grav
Place the YT-1300 grav drive on the btm right side.
10. Cargo
Place the YT-1300 Cargo hold next to Grav drive.
11. Fuel
Place the YT-1300 fuel tank on the upper right side.
12. Shield
Place YT-1300 shield on the top front part of fuselage.
13. Scan Jammer (Rectenna dish) (Equipment)
Place the YT-1300 scan jammer on the top left side.
14. Docker
Place YT-1300 Docker on the far right (middle stbd) side.
15. Laser Cannons(weapon)
Place YT-1300 Quad laser cannons one on top and the other on the bottom.
16. Engine
Finally, place YT-1300 sublight engine on the aft of the ship.
Paint Job
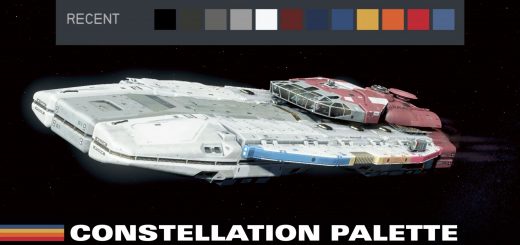
I will leave this totally up to you. Be creative.
I recommend:
Select all by double clicking any ship part (When everything turns red,…)
Color 1: main inner color (default light gray) leave it as is or make it whitish
Color 2: main outer color (default light gray) change it to slightly dark gray (not too dark!)
Now, when finished, click only Fuselage and change
Color 3: default dark red. Change it to brighter solid red (Change it to violet blue if you like Lando’s version)
Select 5 landing gears and change Color 1 2 3 almost white gray, if necessary.
Congratulations! You’ve built the most iconic starship in the SF cinema history!
User manual
Laser cannon
When in game, make sure you give laser enough juice so that top and btm lasers fire rapidly. I handpicked and edited the sound FX tonemulate the Quad laser sound. The sound replaces Shinigami Laser sound with brand-new ones so any mod that modifies the sound is in conflict with my mod.
Sublight engine
Han modified the ship so that the engine is ridiculously fast (as it should be.) You can lose any fighter or chasing ship in a second with
a blazing speed. Thrust button is left shift key by default. If it is too fast,
you can press S key to stop thrusting immediately after. So it would be simultaneous left shift +S to get the amazing speed and stop immediately.
Cockpit
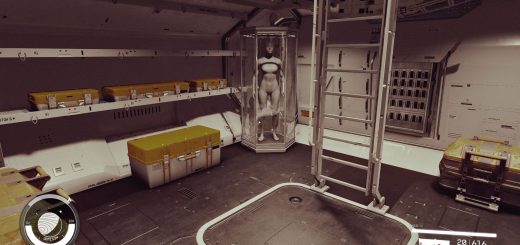
There is no Navmesh at the beginning (and the end)of narrow passageway that connects main fuselage and the cockpit so your companions won’t be able to follow you. I spent so much time trying to connect as smoothly as possible by creating the mesh in blender vertex by vertex, but the angle and adjusting the orientation was extremely challenging to work correctly, hence the current state.
Notes for hardcore SW fans and modders
Well, in the famous trench run in Ep. IV: A New Hope, Luke Skywalker was on the verge of being incinerated, most ironically, by his own father when his father said, “I have you, now”. The Red 5 X-wing was locked on. The death of his own son was imminent, literally a button away. And…“What??!@,” shouted Vader in bewilderment. A hamburger-shaped flying saucer suddenly jetted in out of the blue and saved the day (and thereby the entire galaxy, at least for the time being.) So, Luke turned out to be totally wrong when he initially shouted and called it “What a piece of junk!” without knowing what role it would play in the rebellion against the Empire in the entire Star Wars saga.
This is the reason I decided to build this ship: the ship was used to save the Star Wars universe from evil Sheev Palpatine. Let’s celebrate the ship in Starfield and live the legacy.
Modders:
The goal of my project behind the Millennium Falcon is clear – to make renowned life-size spaceship models from scratch, thereby adding more sophistication and a unified or streamlined look and hence enhancing user experience when flying ships in Starfield.
How?
1. Create a model or download a copyright free quality 3D model from Internet
2. Import it in Blender and separate the model into various parts (use bisect or separate by selection in edit mode)
3. Export each part using Blender plugin by Sesamepaste.
4. Open models in Nifskope and modify translation,rotation, and scale if necessary. Give an appropriate material to each geometry. Create proper collision meshes.
5. Use xEdit by ElminsterAU to register nif files and adjust them to be properly shown in ship builder in game. Read the article. (https://gist.github.com/fre-sch/ea74bc201be01c8e656991baacfc9702#)
6. Assemble and enjoy the unique and slick form and function of your favorite ship!
It may sound simple, but for now as of early March 2024, this process requires a great deal of perseverance and persistence due to inner frustration and occasional anomalies arising, but in the end it is so rewarding and satisfying to reinvent the look and feel of our favorite ships in Starfield.
I really encourage you to give it a go. We can have the Executor or Devastator, Y-wing, B-wing, etc…the possibility is infinite. Should you have any trouble or questions, I am usually available to help you.
Tools used
Blender
Blender plugin (Huge thanks to SesamePaste for his hard work)
Nifskope
xEdit (Deep gratitude goes to ElminsterAU)
My Brain

